Category: AzureDevOps

TFS

TFS TF400917 – Upgrading TFS to move to Azure Devops

A customer at work had an issue upgrading from TFS 2017 to TFS 2019 with a view to moving to Azure DevOps today, so I thought I would blog the issue and the fix in case anyone else runs into the same sort of issue. I learned how to resolve such issues like the one we had shown below: –

TF400917: The current configuration is not valid for this feature was the error message, googling takes you to this link: – https://docs.microsoft.com/en-us/azure/devops/reference/xml/process-configuration-xml-element?view=azure-devops-2020

From here we can download and run a tool called witadmin, you can read more here -> https://docs.microsoft.com/en-us/azure/devops/reference/witadmin/witadmin-customize-and-manage-objects-for-tracking-work?view=azure-devops-2020

If you downlod this tool and export the config like so:-

witadmin exportprocessconfig /collection:CollectionURL /p:ProjectName [/f:FileName]

We can export the processconfig and check for invalid items, in our case there was duplicate State values within the xml. So I exported the xml and made a change by hand and then imported the file with the removed duplicate item using the following command: –

witadmin importprocessconfig /collection:CollectionURL /p:ProjectName [/f:FileName] /v

For both of the commands above you have to supply the CollectionURL, ProjectName and a FileName and then by importing the config this fixed the issue. The devil here is in the detail, find the invalid details, in our case it was a duplicate State of Completed, I had to remove one and save, nope not that one, so I added it back in and removed the other and re-imported the config – problem solved.

Note
You can also download an add-on for Visual Studio which can help with the task of migrating from TFS to Azure DevOps which is called the TFS Process Template Editor. The link to download this is https://marketplace.visualstudio.com/items?itemName=KarthikBalasubramanianMSFT.TFSProcessTemplateEditor

With the above tool, you can visualize the config for your TFS setup which can help you see what’s going on under the hood a little better – a useful tool!.

Kudos to https://twitter.com/samsmithnz for telling me about this – Sam rocks!


Azure DevOps Best Practice Template Project

I wanna show you how you can take an existing Azure DevOps project and use this as a template for any new project within Azure DevOps. So let’s say you create a brand new project within Azure DevOps and set up a default Wiki and add a dashboard etc. (think of your ideal DevOps project setup).

Ok, now that you have this in place you can actually export the entire project – why might you want to do that I hear you ask?

This is so we can effectively clone this best practice project and use, again and again, heck you can even source control the template if you so wish.

So how do you export your best practice website template with you lovely custom process flow, wiki, etc in place? – this is where the following link comes in handy.

https://vstsdemodata.visualstudio.com/AzureDevOpsDemoGenerator/_wiki/wikis/AzureDevOpsGenerator.wiki/58/Build-your-own-template

From this above link check the part that says Building a new custom template and you’ll see a link that is basically this:-

https://azuredevopsdemogenerator.azurewebsites.net/?enableextractor=true

Log in and then look for the link top right that says Build your own template

Now select the Organization you want to use and select the project you wish to use as the best practice template project.

Ignore the error about query items, seems to be a bug, Click Generate Artifacts and you should now have a zip file containing several JSON files.

So now we have the project template JSON files exported how do we create a new project based on this zip file? – well, unfortunately, you need to use the AzureDevopsDemoGenerator tool again.

Log back into the AzureDevopsGenerator and click on the ‘choose template‘ button as seen below:-

and then click Private and then choose your zip file which is the file you exported.

Now fill in the last screen like the screen below and boom!

You now have a new Azure DevOps project which is based on your best practice project like so.


Please give this a try and let me know your thoughts on how useful this is for ya – enjoy!

Gregor


Moving an Azure DevOps repo to use Github Actions instead

In this blog post, I am going to take an existing web application that resides in Azure DevOps and port it to build and deploy within GitHub and use GitHub Actions to build and deploy the same site to GitHub.

Here you can see I have a website in Visual Studio which is currently pointing at a repository inside Azure Devops.

And here is what it looks like inside Visual Studio 2019 with the connection to Azure DevOps.

Now I am going to remove the connection from the Azure DevOps repo by clicking on remove like so:-

When I click on remove, this removes the connection from the code to the Azure DevOps repository. Then I go to the Sync area and it now asks me where do I want to push the code to.

This time I choose to Publish to GitHub.

Give the new repository a name (for within GitHub) and press Publish

This will push the code to a new GitHub repository called AzureGlobalBootCamp2020 which you can now see below.

Now we need to create a GitHub Action so that the code is built and pushed to Azure (like it was from within Azure DevOps previously).

From within your new GitHub repo click on Actions at the top.

I then chose Setup a new workflow yourself

This will take you to a screen and create a main.yaml file.

name: Deploy ASP.NET Core app to Azure Web App

on:
  push:
    branches:
      - master
  pull_request:
    branches:
      - '*'
# CONFIGURATION
# For help, go to https://github.com/Azure/Actions
#
# 1. Set up the following secrets in your repository:
#   AZURE_WEBAPP_PUBLISH_PROFILE
#
# 2. Change these variables for your configuration:
env:
  AZURE_WEBAPP_NAME: AzureGlobalBootCamp2020     # set this to your application's name
  AZURE_WEBAPP_PACKAGE_PATH: '.'                 # set this to the path to your web app project, defaults to the repository root
  DOTNET_VERSION: '3.1.100'                      # set this to the dot net version to use

jobs:
  build-and-deploy:
    runs-on: ubuntu-latest
    steps:

      # Checkout the repo
      - uses: actions/checkout@master
      
      # Setup .NET Core SDK
      - name: Setup .NET Core
        uses: actions/setup-dotnet@v1
        with:
          dotnet-version: ${{ env.DOTNET_VERSION }} 
      
      # Run dotnet build and publish
      - name: dotnet build and publish
        run: |
          dotnet build --configuration Release
          dotnet publish -c Release -o '${{ env.AZURE_WEBAPP_PACKAGE_PATH }}/myapp' 
          
      # Deploy to Azure Web apps
      - name: 'Run Azure webapp deploy action using publish profile credentials'
        uses: azure/webapps-deploy@v2
        with: 
          app-name: ${{ env.AZURE_WEBAPP_NAME }} # Replace with your app name
          publish-profile: ${{ secrets.azureWebAppPublishProfile  }} # Define secret variable in repository settings as per action documentation
          package: '${{ env.AZURE_WEBAPP_PACKAGE_PATH }}/myapp'

# For more samples to get started with GitHub Action workflows to deploy to Azure, refer to https://github.com/Azure/actions-workflow-samples

I then pasted this into the main.yaml file and changed the following:-

AZURE_WEBAPP_NAME: AzureGlobalBootCamp2020
DOTNET_VERSION: ‘3.1.100
publish-profile: ${{ secrets.azureWebAppPublishProfile }}

The last entry above publish-profile requires you to create a new secret in GitHub under Settings -> Secrets and call it azureWebAppPublishProfile and you need to paste in the publishing profile from your Azure Web App

The above screen shows me in the Azure Portal and I’ve clicked into my Azure App Service and when I click on Get Publish Profile it downloads the content of the Publish profile which I paste into the new Secret with GitHub.

And with that we are done, GitHub will kick off the GitHub Action and built and deploy my web app changes when I publish any change to GitHub right into Azure for me.

Note
To read more on using GitHub Actions with .Net you can read more on GitHub here -> https://github.com/actions/setup-dotnet

Feel free to comment below if this is useful or if you have any feedback etc.


Microsoft Learn

Microsoft Learn in my eyes is highly under rated, I want to show you why there is more to it than you have probably realised.

Learning Paths
Learning paths are a great way to explore a topic, there are currently around 1000 learning paths, so what are you waiting for, there is something for everyone in there, which means you. #alwaysbelearning

Filter
You can filter your learning by –

  • Product
  • Roles
  • Levels
  • Type (Learning Paths or Modules)

Bookmarks
Bookmark your learning choices and come back to them, you owe it to yourself to have learning goals and to finish the learning path or module, don’t start it and leave it, become good at finishing and not good at starting.

Collections
Collections are where you can group your own collection of learning paths and modules which might relate to a specific learning goal you have. This is perfect if you are studying for an exam or want to know more about a more general topic like server-less as an example.

Achievements
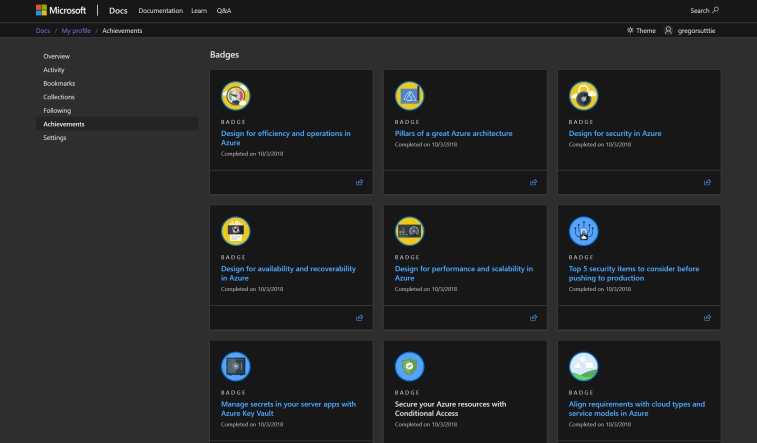
If you complete a module within a learning path you earn points and badges along the way and you can see these listed under achievements which can be found under your profile and looks like so: –

I myself have realised I haven’t been using Microsoft Learn for a while and there is a lot of great new content which I am off to check out now.

Let me know which level your on – I’m currently on level 8.


Azure Advent Calendar wrap-up

The #azureadventcalendar was a shared idea between myself and @pixel_robots

Some quick stats as I write this: –

15,800 thousand YouTube views
15,000 website views from over 120 countries
1,300 hours of videos watched
1,200 subscribers

We set out with the idea of asking the Azure community for 25 videos / blog posts with a Christmas theme, with the idea in mind that it would give people the chance to show off their skills, learn new skills and contribute back to the community over December.

We asked people via twitter who would like to contribute to this idea in the middle of September to give people time to decide if they could manage to contribute in December (a 20-30 minute video isn’t easy, especially towards that time of year).

Before we knew it we had more than 25 filled up and it was clear that this might be a bit more popular than first thought, we increased it to 50 and before you know it we had increased it to 75. In order to avoid too many duplicate subjects we decided to cap it at 75.

Wow! 75 videos/blog post contributions would be pretty amazing.

We considered several ideas but wanted to keep it simple: –

  • Anyone could contribute
  • We could have had advertisements but kept it without as it was a community project for the community by the community and this was important to us both.

I would create the website and keep that up to date daily, and chase people for content, Richard was looking after our YouTube channel and scheduling the videos to go out at midnight.

Richard also designed the logo which I loved the second I saw it and we decided to use this as the brand and he also created video thumbnails for each video for people to use on twitter, videos and blog posts.

Now the real reason this was successful was due to the contributors, we were both blown away by the quality of content from each contributor and the Christmas theme just made it pretty cool.

Richard and I both had our Twitter and LinkedIn full with tweets and articles with the above logo in it, very regularly throughout the month which was super cool to see.

Setup
The website was basic and I was updating it daily with links to blog posts and using a very simple .Net Web app, and using Azure DevOps to build and deploy the web app to Azure, I also made use of staging slots to deploy the changes, check the links etc worked and then swapped the staging slot for production – super easy to do and well worth it.

Richard had the YouTube channel setup with the logo and scheduled the videos to be released using a schedule which was pretty sweet. He also created a thumbnail for each video for the contributor to use as they saw fit.

Highlights
The highlights for me were many, but one that stands out for me personally was seeing people who had never taken part in something like this, some had never created a blog post, many had never created a video before.

The hard part of the project was chasing people for content, especially when it was mid December and everyone is busy!

To end this post I want to mention the next project which you should keep your eye on by Joe Carlyle and Thomas Thornton called the #AzureSpringCleanup – personally looking forward to see more azure community coming together and creating awesome new content.

Please leave any feedback you have on the #azureadventcalendar below.


Azure Web App Staging Slots

With this years Azure Advent Calendar I made some site improvements and also upgraded the site from .Net 2.2 to 3.0, the code built and ran locally just fine, I push it to production and boom! – sites down, not good for a number of reasons.

The take away from this is I knew better, I tried to push some changes which in hindsight could easy have broken the site and by running it locally I thought its all good, the site has no tests as its content only.

By upgrading the site and attempting to add in Azure Application configuration I ran into some nuget package issues which I though I had resolved.

Get to the point of the blog post already Gregor!

Azure has a thing called Azure Deployment Slots for Web apps and with this feature we can have the following: –

  • Have 2 copies of the site running at the same time (one prod, one staging)
  • Deploy new features to Staging ad then test (however you test)
  • If all is good you switch slots so that the new version is now the prod version and the old prod version is switched into the staging version – if anything is borked then switch back and your back to good.

That’s the short version of what deployment slots are used for, I encourage you to take a look at them and I have this now setup for the azure advent calendar and wont be so careless next time.


Microsoft Security Code Analysis for Azure Devops – Part 3 BinSkim

Microsoft has recently released a new set of security tooling for Azure Devops which is called Microsoft Security Code Analysis.

The Microsoft Security Code Analysis Extension is a collection of tasks for the Azure DevOps Services platform. These tasks automatically download and run secure development tools in the build pipeline.

In this post I’ll cover BinSkim and how to use it.


BinSkim
BinSkim is a Portable Executable (PE) light-weight scanner that validates compiler/linker settings and other security-relevant binary characteristics. The build task provides a command line wrapper around the BinSkim.exe application. BinSkim is an open source tool.

Setup:

  1. Open your team project from your Azure DevOps Account.
  2. Navigate to the Build tab under Build and Release
  3. Select the Build Definition into which you wish to add the BinSkim build task.
    New – Click New and follow the steps detailed to create a new Build Definition.
    Edit – Select the Build Definition. On the subsequent page, click Edit to begin editing the Build Definition.
  4. Click + to navigate to the Add Tasks pane.
  5. Find the BinSkim build task either from the list or using the search box and then click Add.
  6. The BinSkim build task should now be a part of the Build Definition. Add it after the publishing steps for your build artifacts.

Customizing the BinSkim Build Task:

  1. Click the BinSkim task to see the different options available within.
  2. Set the build configuration to Debug to produce *.pdb debug files. They are used by BinSkim to map issues found in the output binary back to source code.
  3. Choose Type = Basic & Function = Analyze to avoid researching and creating your own commandline.
  4. Target – One or more specifiers to a file, directory, or filter pattern that resolves to one or more binaries to analyze.
    • Multiple targets should be separated by a semicolon(;).
    • Can be a single file or contain wildcards.
    • Directories should always end with \*
    • Examples:
      • *.dll;*.exe
      • $(BUILD_STAGINGDIRECTORY)\*
      • $(BUILD_STAGINGDIRECTORY)\*.dll;$(BUILD_STAGINGDIRECTORY)\*.exe;
    • Make sure the first argument to BinSkim.exe is the verb analyze using full paths, or paths relative to the source directory.
    • For Command Line input, multiple targets should be separated by a space.
    • You can omit the /o or /output file parameter; it will be added for you or replaced.
    • Standard Command Line Configuration
      • analyze $(Build.StagingDirectory)\* –recurse –verbose
      • analyze *.dll *.exe –recurse –verbose
      • Note that the trailing \* is very important when specifying a directory or directories for the target.

    BinSkim User Guide

    For more details on BinSkim whether command line arguments or rules by ID or exit codes, visit the BinSkim User Guide


Microsoft Security Code Analysis for Azure Devops – Part 2 Credential Scanner

Microsoft has recently released a new set of security tooling for Azure Devops which is called Microsoft Security Code Analysis.

The Microsoft Security Code Analysis Extension is a collection of tasks for the Azure DevOps Services platform. These tasks automatically download and run secure development tools in the build pipeline.

In this post I’ll show you how to get the new extension and how to go about using it.

Credential Scanner (aka CredScan) is a tool developed and maintained by Microsoft to identify credential leaks such as those in source code and configuration files. Some of the commonly found types of credentials are default passwords, SQL connection strings and Certificates with private keys.
The CredScan build task is included in the Microsoft Security Code Analysis Extension. This page has the steps needed to configure & run the build task as part of your build definition.

Lets start by adding Cred Scan to a build for an existing project – I’ll use the AzureAdventCalendar project which I already have setup within my Azure Devops project at https://dev.azure.com.

Setup:

  1. Open your team project from your Azure DevOps Account.
  2. Navigate to the Build tab under Build and Release
  3. Select the Build Definition into which you wish to add the CredScan build task.
    New – Click New and follow the steps detailed to create a new Build Definition.
    Edit – Select the Build Definition. On the subsequent page, click Edit to begin editing the Build Definition.
  4. Click + to navigate to the Add Tasks pane.
  5. Find the CredScan build task either from the list or using the search box and then click Add.
  6. The Run CredScan build task should now be a part of the Build Definition.


Customizing the CredScan Build Task:

Available options include: –

  • Output Format – TSV/ CSV/ SARIF/ PREfast
  • Tool Version (Recommended: Latest)
  • Scan Folder – The folder in your repository to scan
  • Searchers File Type – Options to locate the searchers file used for scanning.
  • Suppressions File – A JSON file can be used for suppressing issues in the output log (more details in the Resources section).
  • (New) Verbose Output – self explanatory
  • Batch Size – The number of concurrent threads used to run Credential Scanners in parallel. Defaults to 20 (Value must be in the range of 1 to 2147483647).
  • (New) Match Timeout – The amount of time to spend attempting a searcher match before abandoning the check.
  • (New) File Scan Read Buffer Size – Buffer size while reading content in bytes. (Defaults to 524288)
  • (New) Maximum File Scan Read Bytes – Maximum number of bytes to read from a given file during content analysis. (Defaults to 104857600)
  • Run this task (under Control Options) – Specifies when the task should run. Choose “Custom conditions” to specify more complex conditions.

*Version – Build task version within Azure DevOps. Not frequently used.


Resources

Local suppressions scenarios and examples

Two of the most common suppression scenarios are detailed below: –

1. Suppress all occurrences of a given secret within the specified path

The hash key of the secret from the CredScan output file is required as shown in the sample below

{
“tool”: “Credential Scanner”,
“suppressions”: [
{
“hash”: “CLgYxl2FcQE8XZgha9/UbKLTkJkUh3Vakkxh2CAdhtY=”,
“_justification”: “Secret used by MSDN sample, it is fake.”
}
]
}

Warning: The hash key is generated by a portion of the matching value or file content. Any source code revision could change the hash key and disable the suppression rule.

2. To suppress all secrets in a specified file (or to suppress the secrets file itself)
The file expression could be a file name or any postfix portion of the full file path/name. Wildcards are not supported.

Example
File to be suppressed: [InputPath]\src\JS\lib\angular.js
Valid Suppression Rules:[InputPath]\src\JS\lib\angular.js — suppress the file in the specified path
\src\JS\lib\angular.js
\JS\lib\angular.js
\lib\angular.js
angular.js — suppress any file with the same name
        {
“tool”: “Credential Scanner”,
“suppressions”: [
{
“file”: “\\files\\AdditonalSearcher.xml”,
“_justification”: “Additional CredScan searcher specific to my team”
},
{
“file”: “\\files\\unittest.pfx”,
“_justification”: “Legitimate UT certificate file with private key”
}
]
}

Warning: All future secrets added to the file will also get suppressed automatically.


Secrets management guidelines
While detecting hard coded secrets in a timely manner and mitigating the risks is helpful, it is even better if one could prevent secrets from getting checked in altogether. In this regard, Microsoft has released CredScan Code Analyzer as part of Microsoft DevLabs extension for Visual Studio. While in early preview, it provides developers an inline experience for detecting potential secrets in their code, giving them the opportunity to fix those issues in real-time. For more information, please refer to this blog on Managing Secrets Securely in the Cloud.
Below are few additional resources to help you manage secrets and access sensitive information from within your applications in a secure manner:


Extending search capabilities
CredScan relies on a set of content searchers commonly defined in the buildsearchers.xml file. The file contains an array of XML serialized objects that represent a ContentSearcher object. The program is distributed with a set of searchers that have been well tested but it does allow you to implement your own custom searchers too.

A content searcher is defined as follows:

  • Name – The descriptive searcher name to be used in CredScan output file. It is recommended to use camel case naming convention for searcher names.
  • RuleId – The stable opaque id of the searcher.
    • CredScan default searchers are assigned with RuleIds like CSCAN0010, CSCAN0020, CSCAN0030, etc. The last digit is reserved for potential searcher regex group merging or division.
    • RuleId for customized searchers should have its own namespace in the format of: CSCAN-{Namespace}0010, CSCAN-{Namespace}0020, CSCAN-{Namespace}0030, etc.
    • The fully qualified searcher name is the combination of the RuleId and the searcher name, e.g. CSCAN0010.KeyStoreFiles, CSCAN0020.Base64EncodedCertificate, etc.
  • ResourceMatchPattern – Regex of file extensions to check against searcher
  • ContentSearchPatterns – Array of strings containing Regex statements to match. If no search patterns are defined, all files matching the resource match pattern will be returned.
  • ContentSearchFilters – Array of strings containing Regex statements to filter searcher specific false positives.
  • Matchdetails – A descriptive message and/or mitigation instructions to be added for each match of the searcher.
  • Recommendation – Provides the suggestions field content for a match using PREfast report format.
  • Severity – An integer to reflect the severity of the issue (Highest = 1).


Join me in part 3 where I cover off BinSkim


Microsoft Security Code Analysis for Azure Devops – Part 1

Microsoft has recently released a new set of security tooling for Azure Devops which is called Microsoft Security Code Analysis.

The Microsoft Security Code Analysis Extension is a collection of tasks for the Azure DevOps Services platform. These tasks automatically download and run secure development tools in the build pipeline.

In this post I’ll show you what they cover below, in part 2, I’ll show you them in action in Azure Devops.


Credential Scanner
Passwords and other secrets stored in source code is currently a big problem. Credential Scanner is a static analysis tool that detects credentials, secrets, certificates, and other sensitive content in your source code and your build output.

More Information


BinSkim
BinSkim is a Portable Executable (PE) light-weight scanner that validates compiler/linker settings and other security-relevant binary characteristics. The build task provides a command line wrapper around the BinSkim.exe application. BinSkim is an open source tool.

More Information (BinSkim on GitHub)


TSLint
TSLint is an extensible static analysis tool that checks TypeScript code for readability, maintainability, and functionality errors. It is widely supported across modern editors and build systems and can be customized with your own lint rules, configurations, and formatters. TSLint is an open source tool.

More Information on Github


Roslyn Analyzers
Microsoft’s compiler-integrated static analysis tool for analyzing managed code (C# and VB).

More Information (Roslyn Analyzers on docs.microsoft.com)


Microsoft Security Risk Detection
Security Risk Detection is Microsoft’s unique cloud-based fuzz testing service for identifying exploitable security bugs in software.

More Information (MSRD on docs.microsoft.com)


Anti-Malware Scanner
The Anti-Malware Scanner build task is now included in the Microsoft Security Code Analysis Extension. It must be run on a build agent which has Windows Defender already installed.

More Information


Analysis and Post-Processing of Results

The Microsoft Security Code Analysis extension has three build tasks to help you process and analyze the results found by the security tools tasks.

  • The Publish Security Analysis Logs build task preserves logs files from the build for investgiation and follow-up.
  • The Security Report build task collects all issues reported by all tools and adds them to a single summary report file.
  • The Post-Analysis build task allows customers to inject build breaks and fail the build should an anlysis tool report security issues found in the code that was scanned.

Publish Security Analysis Logs
The Publish Security Analysis Logs build task preserves the log files of the security tools run during the build. They can be published to the Azure DevOps Server artifacts (as a zip file), or copies to an accessible file share from your private build agent.

More Information


Security Report
The Security Report build task parses the log files created by the security tools run during the build and creates a summary report file with all issues found by the analysis tools.
The task can be configured to report findings for specific tools or for all tools, and you can also choose what level of issues (errors or errors and warnings) should be reported.

More Information


Post-Analysis (Build Break)
The Post-analysis build task enables the customer to inject a build break and fail the build in case one ore more analysis tools reports findings or issues in the code.
Individual build tasks will succeed, by design, as long as the tool completes successfully, whether there are findings or not. This is so that the build can run to completion allowing all tools to run.
To fail the build based on security issues found by one of the tools run in the build, then you can add and configure this build task.
The task can be configured to break the build for issues found by specific tools or for all tools, and also based on the severity of issues found (errors or errors and warnings).

More Information


Azure DevOps Generator – New Content

Recently Microsoft open sourced the Azure Devops Generator and recently its had some new content added which I wanted to highlight. You can use this tool to learn all sorts of Azure Devops tips and tricks from building code, seeing how it hangs together, deploying and even checking your code for vulnerabilities with arm templates and GitHub resources etc.


I can’t stress how useful this resource has been for me to spinning up test Azure Devops Projects for blog posts, testing security add-ons, etc. (more blogs to follow very soon). Please play with this and learn, the demo generator has a lot more in it than the lat time I checked and was pleasantly surprised, its an awesome tool.

The following is a quick tour of what is there at present: –

General Tab
The general tab is for creating projects in Azure DevOps from existing project templates, this will give you full source code, build and release pipelines, wikis, example kanban boards with issues etc and more
Note: There are different types of project if you scroll down the list.


Devops Labs Tab

On this tab we have more sample projects, but this time they cover the concepts of things like using Terraform, Ansible, Docker, Azure Key Vault and more, if you want to learn more about these then here is a great way to give them a spin.


Microsoft Learn Tab
Using Microsoft Learn we can learn how to do things like: –

  • Create a build pipeline with Azure Pipelines
  • Scan code for vulnerabilities in Azure Pipelines
  • Manage database changes in Azure Pipelines
  • Run non-functional tests in Azure Pipelines

Microsoft Cloud Adoption Framework Tab

The Cloud Adoption Plan template creates a backlog for managing cloud adoption efforts based on the guidance in the Microsoft Cloud Adoption Framework.


Private Tab

Azure DevOps Demo Generator enables users to create their own templates using existing projects and provision new projects using extracted template. The capacity to have custom templates can be helpful in many situations, such as constructing custom training content, providing only certain artifacts, etc.


You can even create a template from an existing project you have within Azure DevOps by selecting ‘Create New Template’ – this is super nice, I’ll leave you to explore this further.

Enjoy!