Ok so Part 1 covered how to do a manual build of a .NET Core Web App and now I’ll show how to do a manual deployment of the project.
Part 2 will cover creating a manual release from the build in Part 1 (I’m assuming your manual build is working)
Before starting this please manually create a Resource Group, App Service Plan and an App Service within the Azure Portal, for this demo I created the following:
Resource Group called BlogPostDemoRG AppService Plan called BlogPostDemoAppPlan App Service called BLogPostDemo
- So back in Azure Devops (devops.azure.com/)
- Under Pipelines (on the left) click on Releases
- Choose New Pipeline
- Choose Azure App Service deployment
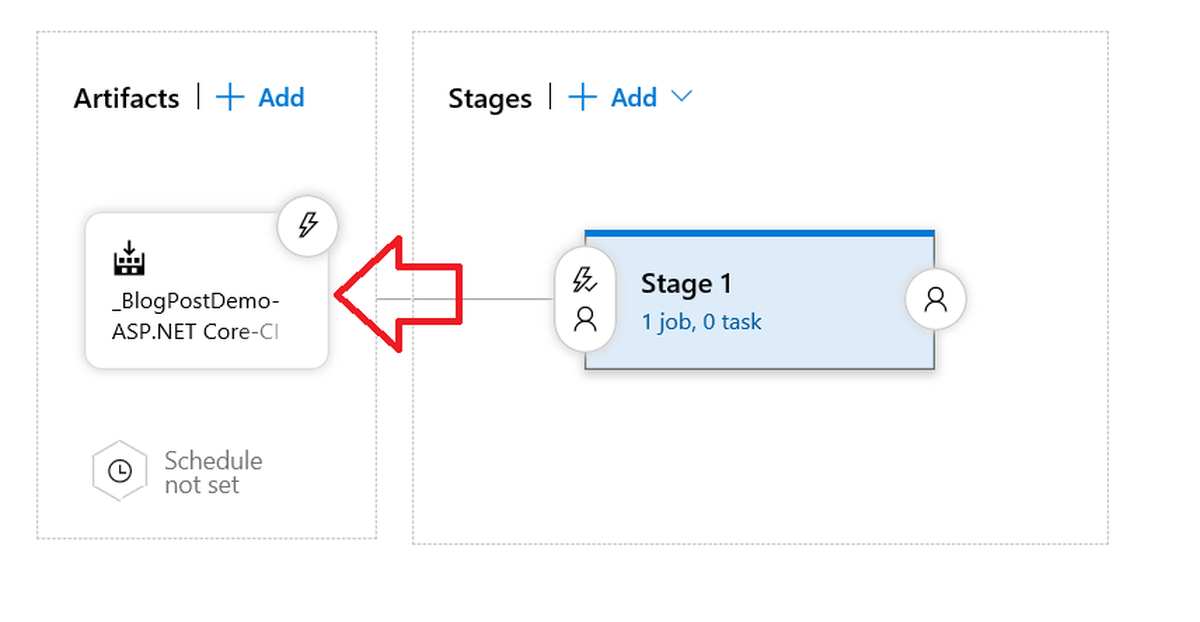
- Click on Artifacts + Add
- Select the Source and then Click Add
- At this point you should see something like so

Setup the Stage
- Enter a Stage Name (leave it as Stage 1 for now), then close the right hand screen
- Click where it says 1 job, 1 task (it should be red currently as some settings need to be supplied)
- Add a New Task
- Choose the Azure App Service Deploy Task
- Fill in the settings which are red
- Choose your Azure Subscription
- Click Authorize and sign in to your Azure Subscription
- Select your already created App Service (I called my blogpostappdemo)
- Where it says Package or folder click the ellipses and browse to the drop folder like so
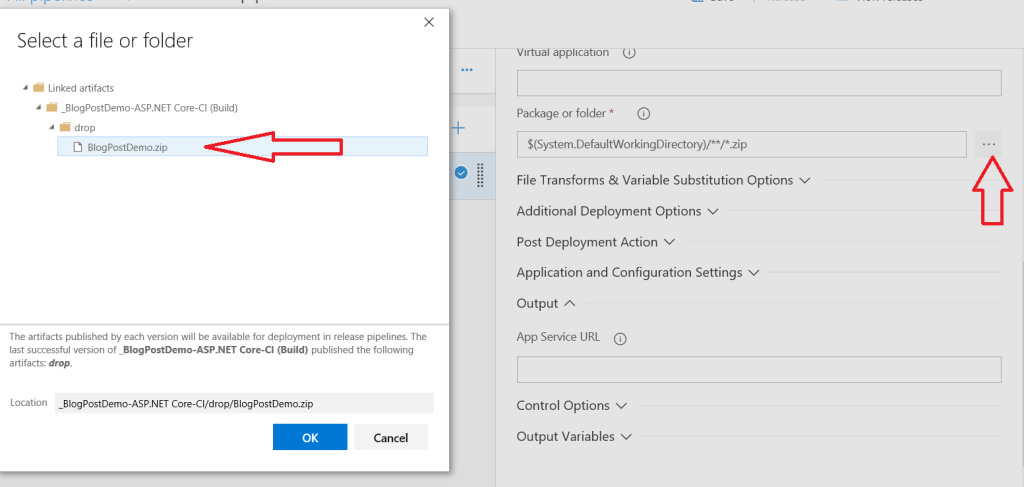
- Click Ok
- Click Save to save your changes
Deploy Time
- At this point you should be able to deploy the code
- From the Top Click Release, Create a Release
- Enter Stage 1 as the stages for a trigger change (or whatever you called it in step 4)
- Select the Artifact from the drop down (artifact is basically which version of the code do you wish to deploy)
- Click Create
- In Green header you’ll see that a Release has been created, click on it
- Underneath the Stage 1 in middle of the screen it’ll say not deployed, select Deploy once you hove over that part
- Click Deploy, then click where it says In Progress
- Once the build succeeds go back to the Azure Portal and locate your App Service and click on the url to launch the site
Congrats you should now have your first Azure Devops manual build and now your first manual release, but lets not stop there as this is only us getting warmed up, how about in Part 3 we automate both the build and the release.